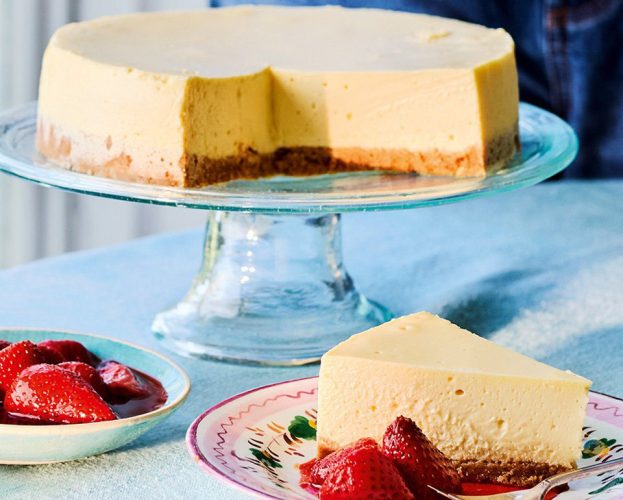
Clotted cream cheesecake with roast strawberries
🍽 Serves 6 (with plenty left over; will serve up to 16)◆ Easy

Baked cheesecake recipes
Grease the base and sides of the cake tin. Detach the sides from the base, then line the base with a large piece of baking paper that extends beyond the sides. Attach the sides so that the baking paper now extends outside the tin (this will make it easier to remove the base later). If you have a good non-stick cake tin, there’s no need to line the sides, but if you don’t trust your cake tin then it’s a good idea to also line the sides with baking paper.
First, make the biscuit base. Use a food processor to whizz the cookies into fine breadcrumbs or put the cookies inside a sealed freezer bag and crush with a rolling pin. With this quantity of cookies it’s easier to do this in small batches.
Add the cookie crumbs and melted butter to a mixing bowl. Mix until all the crumbs are evenly coated and resemble fine sand.
Pour the mixture into the prepared tin. Use something with a flat base and straight sides (like a measuring cup) to firmly pack the crumbs to cover the base in a roughly even layer. Put in the freezer while you make the cheesecake filling (see Kim Joy’s Tips).
Heat the oven to 160°C/140°C fan/gas 3. To make the filling, add the cream cheese to a large mixing bowl. Mix until smooth. If using a stand mixer, use the paddle attachment and mix for 30 seconds or so on the slowest speed. You can also use a handheld electric whisk – avoid mixing for too long and introducing air. If mixing by hand, it helps to use a spatula to break up the cream cheese, then use a balloon whisk.
Add the yogurt, sugar, cornflour, lemon zest and vanilla. Mix again (in the same way as above) for about 30 seconds, or until everything is just combined.
Add the eggs and whisk until combined – again, avoiding whisking too fast or too long. Remove the biscuit base from the freezer and pour in the cheesecake mixture.
Bake for 1 hour 10 minutes–1 hour 20 minutes or until set yet still with a wobble on top. Turn the oven off, leave the door cracked open slightly (wedge a wooden spoon in to keep it open if necessary) and leave the cheesecake to gradually cool down in the oven for 45 minutes. After that, cover the cheesecake and put it in the fridge to cool completely (keep it in its tin for now until it’s cooler/more stable).
Meanwhile, make the blueberry topping. Add 150g of the blueberries to a small pan, then add the lemon juice, cornflour and sugar, and use a spatula to mix together. Bring to a simmer for about 6 minutes over a medium heat, with just an occasional little stir to make sure nothing sticks. It will still seem thin/syrupy when it’s ready, but it will thicken further as it cools. Add the rest of the blueberries and stir in. Transfer to a bowl and leave to cool at room temperature.
To make the blueberry creatures. Spoon about a third of the icing into another small bowl and mix with black food dye to colour. Transfer the white icing to a piping bag, and the black icing to another. Cut very small openings on each piping bag, then use these to pipe the dots for the blueberry eyes onto the fresh blueberries – starting with a larger white dot, then adding a smaller black dot for the pupils. Set these aside until you’re ready to decorate.
Once the cheesecake is cool, gently run a thin knife around the sides to make sure none of the cheesecake is sticking (it should mostly have pulled away from the sides so this should be easy enough), then detach and remove the sides. Use the paper to carefully slide the whole cheesecake off the metal base and on to a serving plate, then you can wiggle the paper out from underneath. Spoon the blueberry sauce over the top, then decorate with the blueberry creatures.