Nicola’s tips…
Baking recipes · Spanish recipes
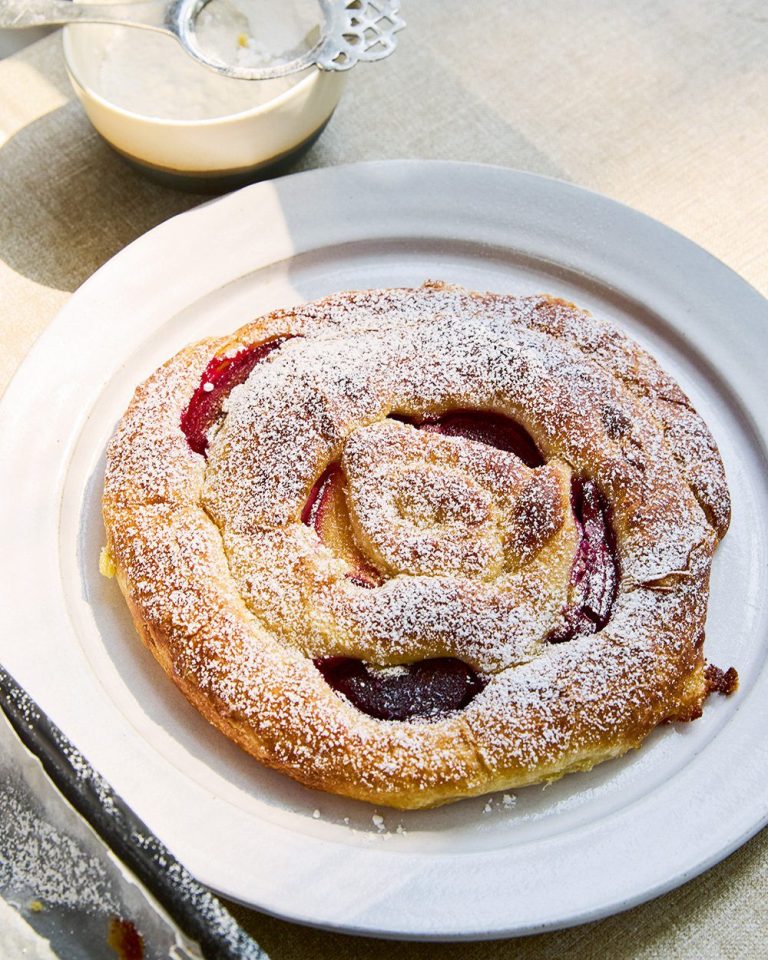
Plum and frangipane ensaïmada
Vegetarian
DifficultyMedium
Method
To make the dough, put the flour, milk, egg, vegetable oil, 20g of the butter or lard and 50g water in the bowl of a stand mixer with a dough hook attached. Add the yeast to one side of the bowl and the salt to another. Mix at a medium speed for 5 minutes.
Leave to rest for 1 minute, then repeat this process of mixing for 5 minutes and resting for 1 minute three more times (so a total of 20 minutes mixing and 4 minutes resting). Check the gluten development; the dough should be extremely stretchy so you can pull it ultra-thin. If not, mix for another 5 minutes, rest again, then re-check.
Turn out the dough onto the table and perform a few slap-and-folds (see Know-how) until it forms a smooth ball (it will be quite loose and sticky). Transfer to an oiled bowl, cover and leave to rest for 1 hour at room temperature or up to 24 hours in the fridge.
To make the frangipane, mix all the ingredients except the egg with a pinch of salt until a little fluffy. Add the egg and mix well until combined. Transfer to a piping bag and keep in the fridge for up to 5 days. It will need to come back to room temperature for 30 minutes or so to make it easier to pipe.
To shape the ensaïmada, spread your work surface liberally with some of the leftover butter or lard. Divide the dough into 4 x 130g pieces, trying to shape them into a rough rectangle. Set them to one side and cover with a damp cloth.
Take a piece of dough and put it in the centre of your greased work surface. Coat your hands in some of the fat too, then use your fingers to press the rectangle and make it bigger. Use a rolling pin (also greased) to roll out the dough into an even larger rectangle, around 70-80cm on the long side.
When you feel like the rolling pin won’t stretch the dough any further, pick up the dough with your hands and start stretching it out – it will cling to the greased work surface. Don’t worry too much about tears or holes – you want it to be so thin you can see through it.
Keep your hands greased with more butter or lard as needed, and spread around 30g of it over the top of the dough as you work.
When it’s as thin as you can get it – around 85cm x 30cm – trim off any scraggly edges with a dough scraper and line these up along one edge. This is the fluffy ‘heart’ of the ensaïmada. Pipe a 1-2cm thick line of frangipane along the same edge.
Use your dough scraper to help you start rolling up the dough, starting at the side with the frangipane.
Flip over the dough in little flicks along the edge, creating a tight roll or cylinder.
Coil this cylinder into a spiral on a lined baking sheet, leaving a 1cm gap between the coils.
Repeat with the remaining 3 pieces of dough until you have 4 ensaïmadas in total (2 per baking sheet). Leave to prove for 2-3 hours at room temperature, loosely covered and ideally misting them with water occasionally. They should puff up and the coils should almost start touching.
Heat the oven to 200°C/180°C fan/gas 6. Stone the plums, cut them into wedges and tuck into the coils of each ensaïmada.
Give the pastries a generous spray or flick of water, then bake for 13-15 minutes. Keep a close eye on them – they will brown especially quickly if you’ve used butter. You’ll know they’re ready when the base is crisp and golden as well as the top. If this doesn’t happen and they’re browning too quickly on top, cover them with foil and return to the oven for another 5 minutes.
Leave to cool completely, then dust generously with icing sugar just before serving.
Quick wins, tips & make ahead
Weigh your eggs. A medium egg weighs about 50g, but with baking it’s all about precision so you may as well weigh them and get everything spot on.
Embrace the fat! You need lots of butter or lard on your work surface, your hands and on the dough to help you stretch it as thin as it will go. It’s a satisfying dough to work with but if you skimp on the fat it can be difficult to shape.
Don’t worry about holes. The rolling and coiling process creates so many little layers that holes and tears are easily covered. Despite looking intimidating it’s a surprisingly forgiving dough – and you cover it with icing sugar at the end, which helps hide a multitude of sins!
Rate & review
If you loved this
See all →More baking recipes

Toasted cobnut and dark chocolate chip cookies
🍽 Makes 12 cookies◆ Easy
Butternut squash sticky toffee pudding
🍽 Serves 8◆ Easy

Strawberry tarts
🍽 Makes 12◆ Medium

Fig and oat cookies
🍽 Serves 5◆ Easy
Keep browsing